How I made my KVM switch smart
The problem
Since implementing a KVM switch in my multi-computer desk setup, I’ve had one consistent problem. Each time I begin work, my KVM switch must be switched to my work laptop. A few months back, I decided to enable WoL (Wake-on-LAN) and run an automation each morning 5 minutes before I start work to turn on my work laptop. In the happy path, I typically have no issues. However, if say for example, I leave my KVM switched to PC 1 (my desktop) when I go to bed and forget to change it to PC 1 before my laptop boots, I spend about 3-4 minutes trying to shut down my laptop. Why does it take 3-4 minutes? My work laptop is running closed-clamshell mode 100% of the time since I share my peripherals between my desktop and my laptop.
The issue is one I and many others have experienced - sleep and hibernate on Linux. I’ve found that not having a physical display connection available while my laptop boots with the lid closed, the laptop immediately enters into hibernate or sleep (I’m not entirely sure) and my peripherals go unresponsive for waking the laptop. The only way out I know of is to reboot my laptop. I either have to hold the power button on the docking station or awkwardly open my closed laptop. The docking station takes about 10 seconds to eventually shut down the computer, and then has a grace period before I can turn my laptop back on.
I’ve wanted a way to automatically switch to the correct computer so my work-life separation is much more seamless.
The solution
I started looking for a smart KVM switch with remote network controls. As far as I’ve looked, there are zero smart KVM switches. Even some of the best switches offered by the Level1Techs team do not offer the feature. I started looking for my own ways to make my switch be able to be remotely controlled. These were my three overarching goals:
- Controlling my KVM switch from anywhere
- Automating the ‘switch’ activation each morning to ensure my work laptop is always the active computer when starting work
- Keeping the existing functionality of the switch button I’ve been used to switch PCs up to this point
While all of my goals weren’t fully realized until writing this post, the overarching idea of automating being set up on my work laptop was the end goal, but I knew it wasn’t going to be as trivial as adding remote functionality since I’d also need a way to track the state of the switch. However for the start, I’d need to get an IoT device wrapping around the switch.
Planning
The KVM switch
The KVM I bought a few years back is a cheap Amazon product I found that provides two computer connections, with displays connected via DisplayPort, supporting 1440p@144Hz. The device has USB2.0 ports and a physical switch button to toggle the active computer.

The route I aimed for was adding a device to activate the switch button extension. While I could directly tap into the KVM switch, I wasn’t confident in knowing what I was doing, so I decided trying to emulate an action would be safer so I didn’t cost myself one of my most important desk peripherals.
The physical switch
Now that I know I want to emulate the physical switch, I needed to figure out how it works.
The toggle switch is connected through a 3.5mm jack. Upon first glance, it wasn’t clear to me how pressing the button would fire off a computer switch. I used a multi-meter to determine that the cable connected to the KVM was providing an electrical current. My best guess here is that when I press the physical ‘switch’ button, the circuit completes which tells the KVM switch that it needs to change the active computer.
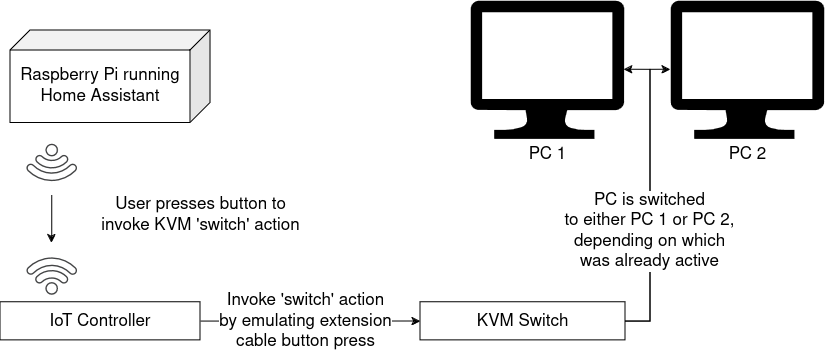
With this knowledge, my mental image of how this should work was starting to piece together. Here’s a little diagram to visualize it.
The IoT device
From past experience, I was planning on using an ESP8266 to run this project, but while working out the details, I learned that it’s successor is the ESP32. These things are dirt cheap and provide Bluetooth and Wi-Fi connectivity.
Controlling the ESP32 from Home Assistant
The team behind Home Assistant (Nabu Casa) provide an awesome system called ESPHome which allows you to build your own firmware for your ESP device. Using ESPHome automatically integrates the ESP-based device into Home Assistant after configuring the networking to point to your Wi-Fi on the device.
Execution
My part list
- ESP32-WROOM-32 (3 pcs.)
- Breadboard-Friendly 3.5mm Stereo Headphone Jack
- Half Sized Premium Breadboard - 400 Tie Points
- Breadboarding wire bundle
Installing ESPHome
I installed ESPHome onto my ESP32 by visiting ESPHome’s Ready-Made Projects page, selecting ‘Empty ESPHome device’ and clicking Connect. Once connected, I was asked to install the firmware.
Some considerations:
- The cable you use for connecting/installing the ESPHome firmware onto the device does matter - you’ll need a cable capable of data transfer, otherwise it won’t work.
- If you’re using Linux like I am, you’ll also need to grant read/write access to the device. I used the command
sudo chmod a+rw /dev/ttyUSB0, where/dev/ttyUSB0was my ESP32 device connected to my computer.
After the install was successful, I was given the option to connect to a network on the webpage, and this configured my ESP32 to connect to my home network via Wi-Fi. After that, it was as simple as opening Home Assistant, where my device was already connected and integrated.
Adding functionality to the device
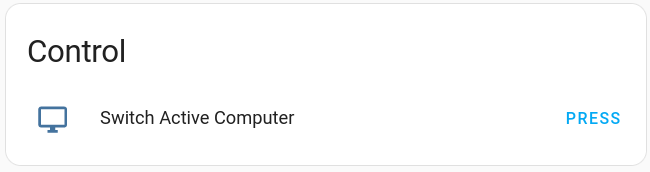
I started putting functionality onto the device by testing different combinations of outputs to invoke a switch. Some would cause the KVM switch to go unresponsive as soon as the 3.5mm cable was connected to the ESP via the breadboard. I imagine this was due to the circuit staying complete at all times (the same thing as the button being held down indefinitely), making it enter a loop of constant switching. I tried more options until I was finally able to invoke a switch through a button in Home Assistant.
The complete YAML:
esphome:
  name: kvmswitch-controller

esp32:
  board: nodemcu-32s
  framework:
    type: arduino

# Enable logging
logger:

# Enable Home Assistant API
api:
  password: ""

web_server:
  port: 80

ota:
  password: ""

wifi:
  ssid: "My SSID"
  password: "My Password"

  # Enable fallback hotspot (captive portal) in case wifi connection fails
  ap:
    ssid: "Device SSID"
    password: "Device Password"

captive_portal:

output:
  - platform: gpio
    id: kvmoutput
    pin:
      number: 13
      mode:
        output: True
        open_drain: True
      inverted: True
  - platform: gpio
    id: blueled
    pin:
      number: GPIO2

button:
  - platform: output
    name: "KVM Switch Active Computer"
    output: kvmoutput
    duration: 500ms
    on_press:
      then:
        - output.turn_on: blueled
        - delay: 150ms
        - output.turn_off: blueled
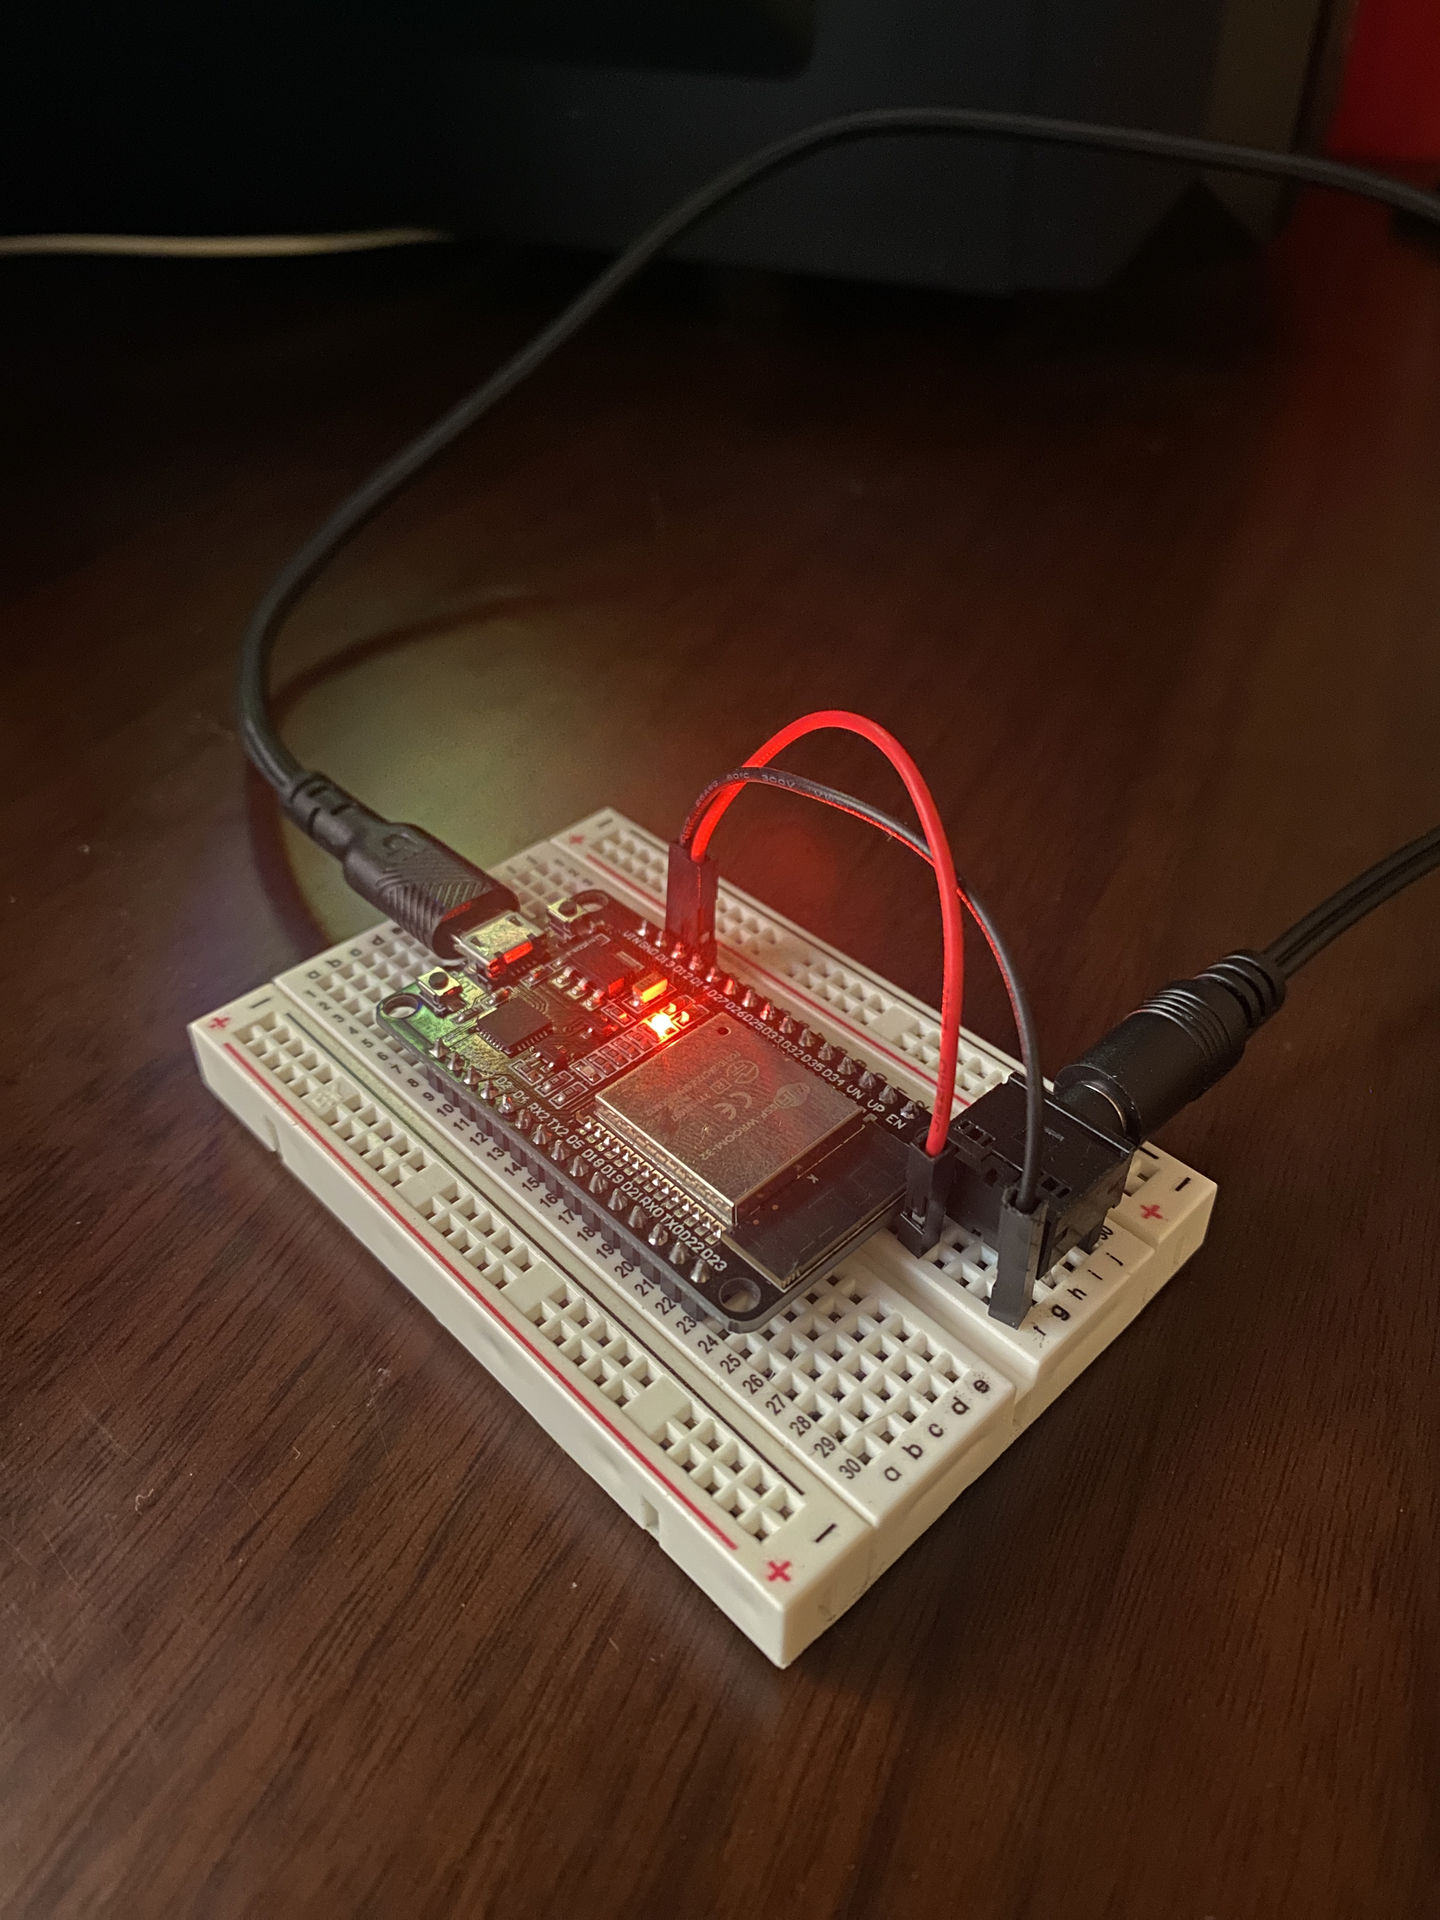
Here’s the prototype of the smart KVM switch controller.
Conclusion
I haven’t worked much with electronics, but the last time I had tried it didn’t go successfully. I attempted to RGH-Hack an Xbox 360 that I wanted to put Linux on, but ended up burning the Xbox 360 PCB. What I quickly learned was that soldering is challenging and if done incorrectly can bring a project to the ground.
And that’s why you should start smaller. If I would have known how much easier this project would be, I would have much rather started here to get a better understanding of how circuits work. Soldering is usually one of the last steps in your circuit building project. Everything before it should be a prototype.
This blog post has taken about 3-4 months to write and complete. It’s mainly taken so long because I’m lazy. Before I’m ready to mark this project as complete, I have a few more goals I still need to get to:
- [x] Controlling my KVM switch from anywhere
- [ ] Automating the ‘switch’ activation each morning to ensure my work laptop is always the preferred PC when starting work
- [ ] Keeping the existing functionality of the switch button I’ve been used to switch PCs up to this point
- [ ] Research direct connections to the PCB in the KVM switch
- [ ] Monitor the state of the active PC to achieve the second goal
Thanks for reading, and have a good day!